
Hey Learners! Welcome back. In the previous challenge, we created our first Terraform configuration file to create an EC2 Instance on AWS using AWS resources for Terraform. Moving forward, in this challenge we'll understand the concept of Terraform Resources in depth. Let's dive into it...
Terraform Resources:-
A resource in Terraform is a unit of infrastructure, such as a compute instance, a storage bucket, or an email provider. In the Terraform configuration file, you declare resources defined by providers for Terraform and then using these resources, Terraform creates, updates, or destroys corresponding infrastructure objects in a cloud provider or other service.
Resources are declarations of specific infrastructure components you want to manage using Terraform. Providers and Resources allow Terraform to declaratively describe and manage complex infrastructure with ease.
Task 1- Create a Security Group
Make sure you have all prerequisites done already. See Day64 for Pre-requisites
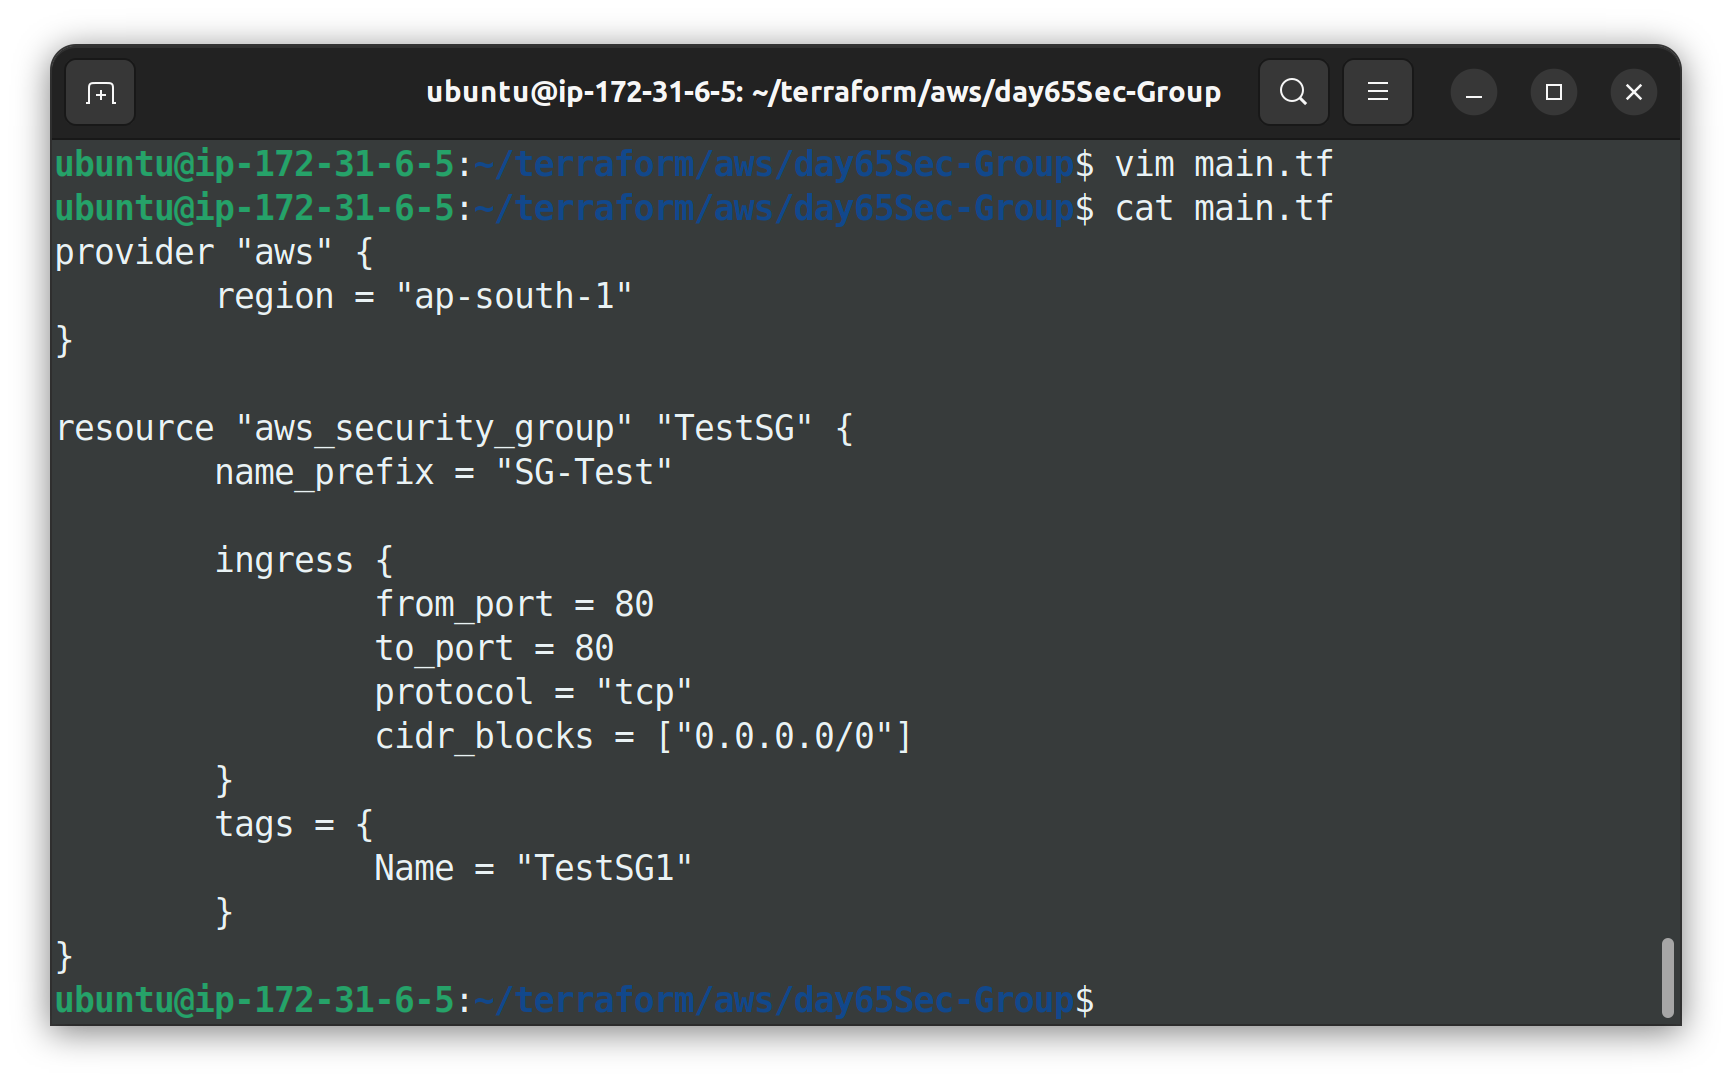
1- Create main.tf file as shown below
provider "aws" {
    region = "ap-south-1"
}

resource "aws_security_group" "TestSG" {
    name_prefix = "SG-Test"

    ingress {
        from_port = 80
        to_port = 80
        protocol = "tcp"
        cidr_blocks = ["0.0.0.0/0"]
    }
    tags = {
        Name = "TestSG1"
    }
}
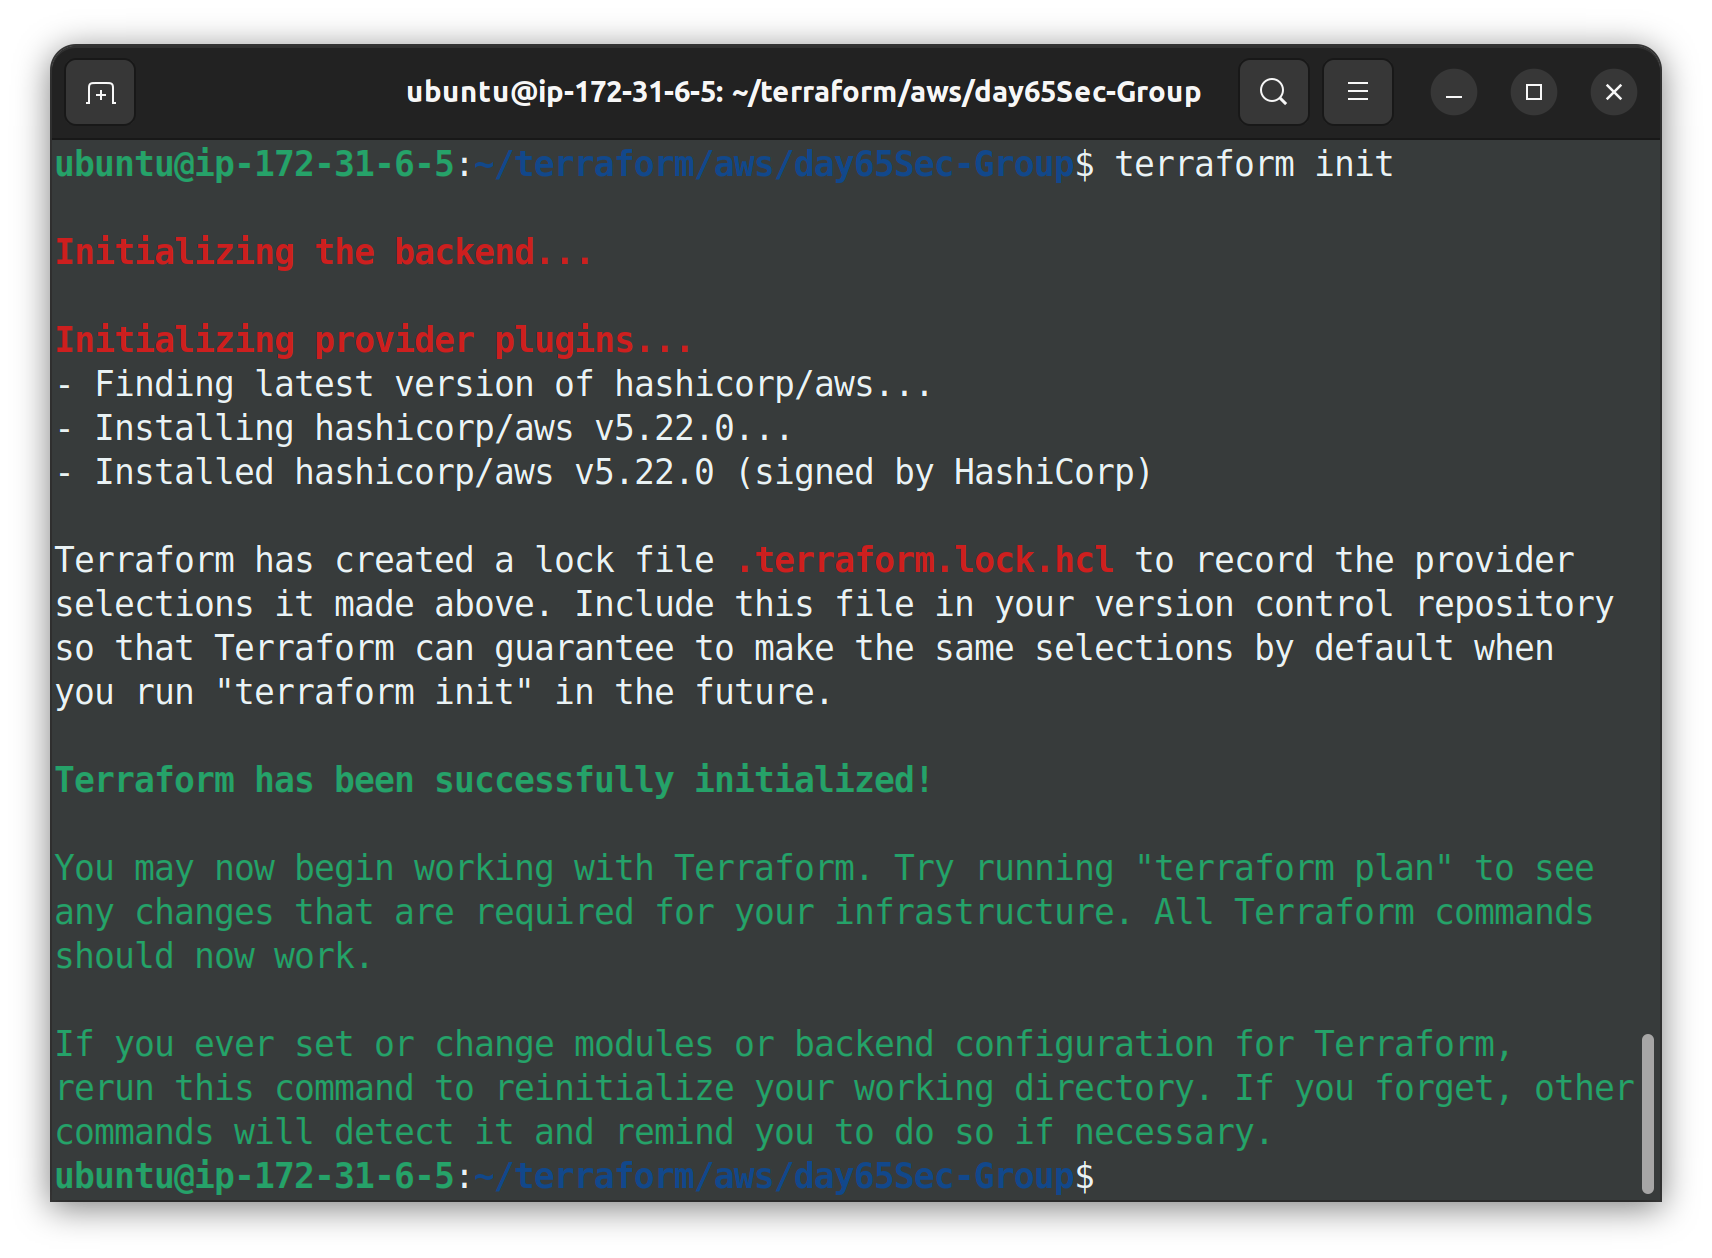
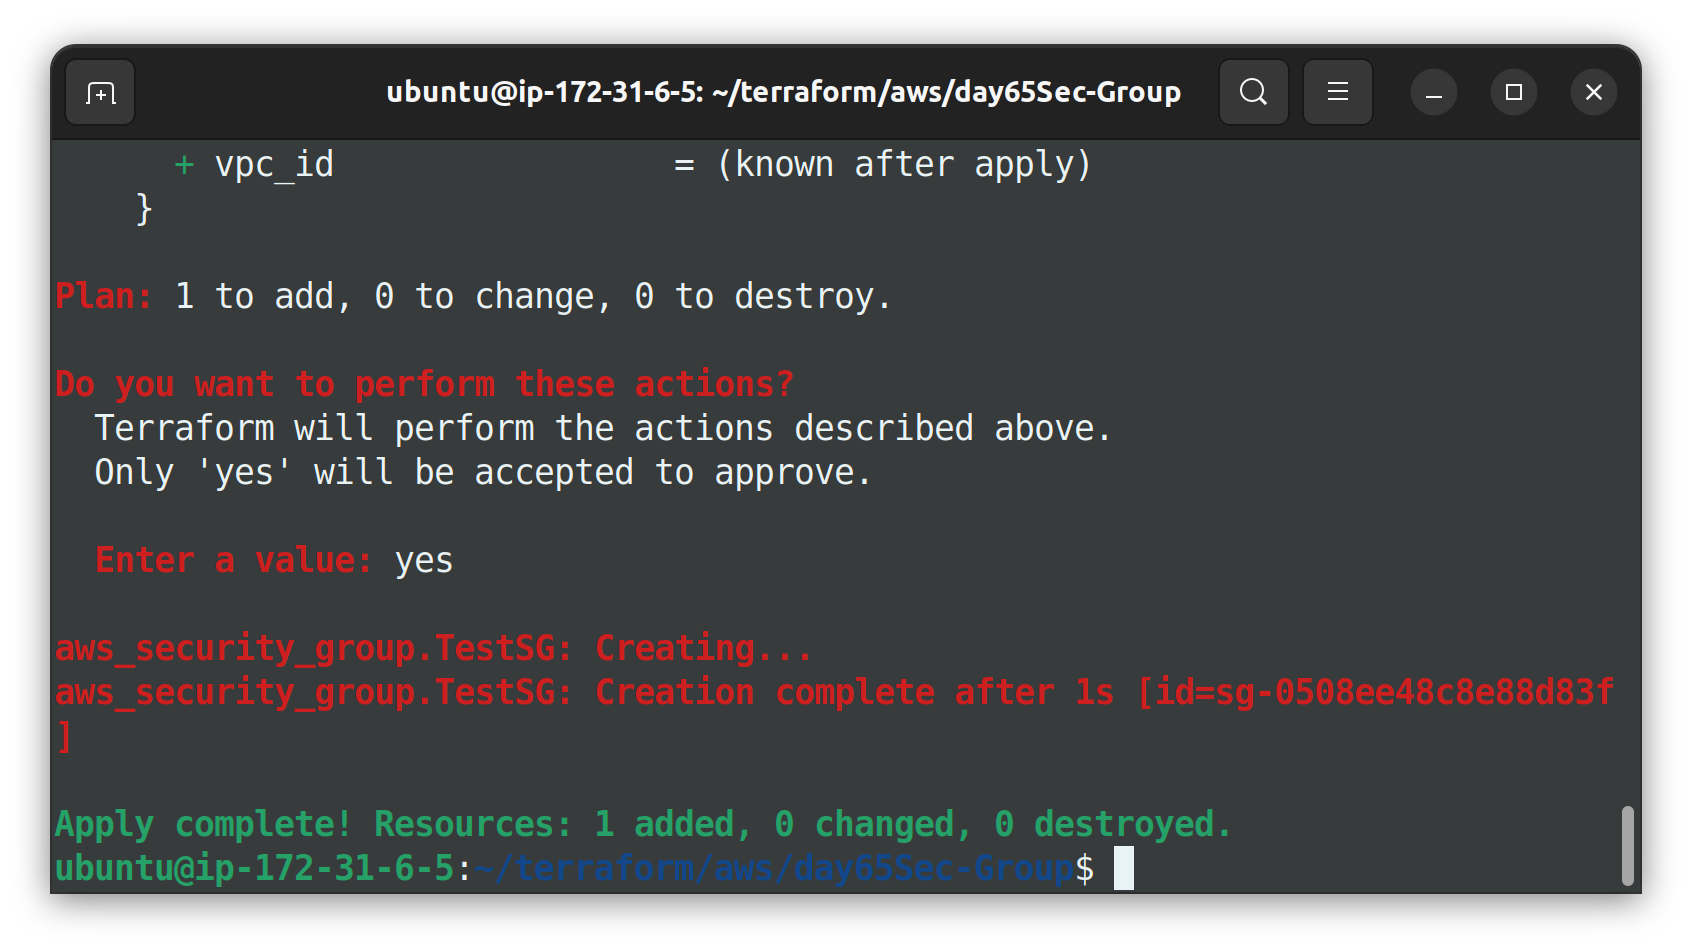
2- Run the terraform init command to initialize the Terraform project and apply the changes using the terraform apply command.
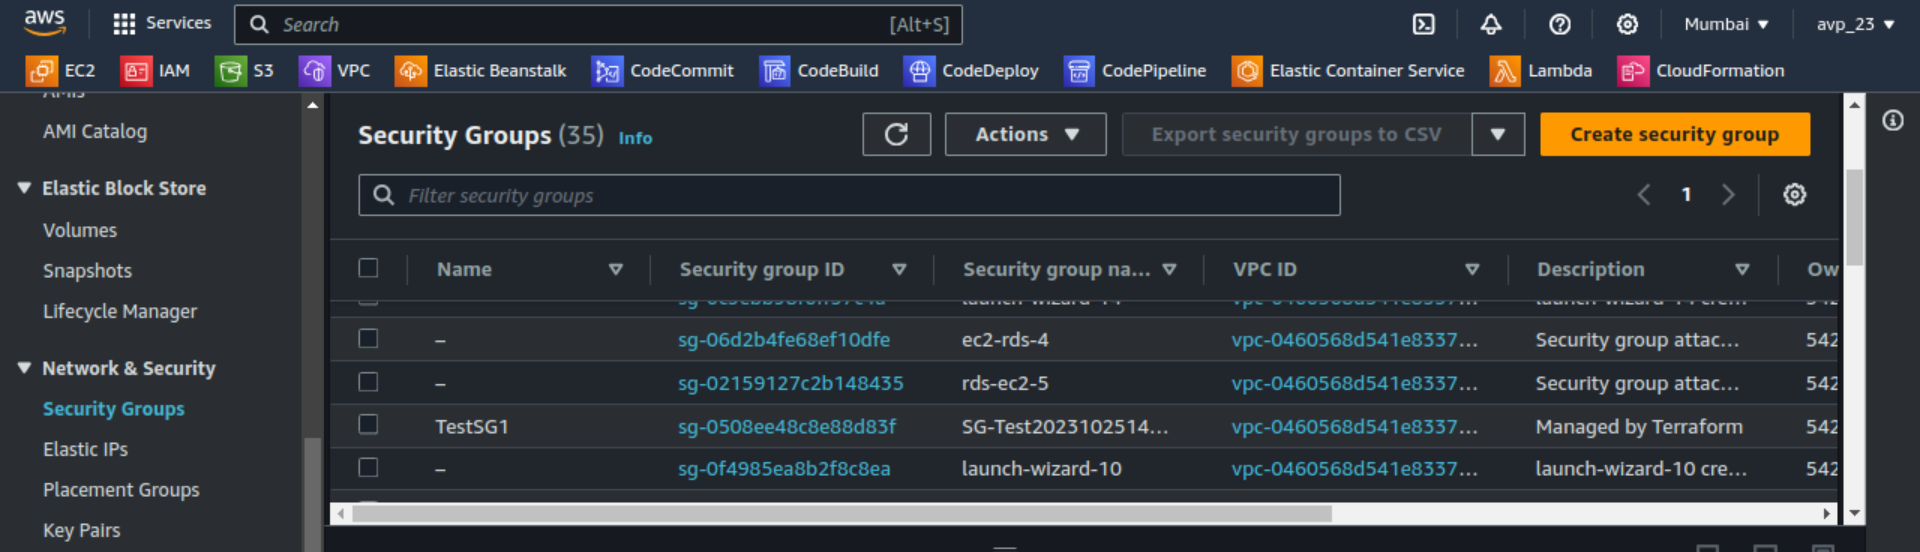
3- Verify the changes
Go to the AWS console and search for EC2 service. Go to the Network & Security section from the left navigation pane and select Security Groups.
Task 2- Create an EC2 Instance
We created an EC2 instance on AWS already in the previous challenge. In this Task, we created an EC2 instance using user data in the Terraform configuration file.
1- Add the below resource block in the main.tf
Note- You should add egress in Security Groups to communicate EC2 outside the VPC.
provider "aws" {
    region = "ap-south-1"
}

resource "aws_security_group" "TestSG" {
    name_prefix = "SG-Test"

    ingress {
        from_port = 80
        to_port = 80
        protocol = "tcp"
        cidr_blocks = ["0.0.0.0/0"]
    }
    egress {
        from_port = 0
        to_port = 0
        protocol = "-1"
        cidr_blocks = ["0.0.0.0/0"]
    }
    tags = {
        Name = "TestSG1"
    }
}

resource "aws_instance" "intsnace" {
    ami = "ami-0f5ee92e2d63afc18"
    instance_type = "t2.micro"
    key_name = "nginxproject"
    security_groups = [
        aws_security_group.TestSG.name
    ]
    user_data = <<-EOF
                        #!/bin/bash
                        sudo apt-get update -y
                        sudo apt-get install nginx -y
                        sudo systemctl start nginx
                        echo "Welcome to my website created by Terraform!" > /var/www/html/index.html
                        sudo systemctl restart nginx
                        sudo systemctl enable nginx
                EOF
    tags = {
        Name = "Nginx-Server"
    }
}
2- Apply the changes using the terraform apply command.
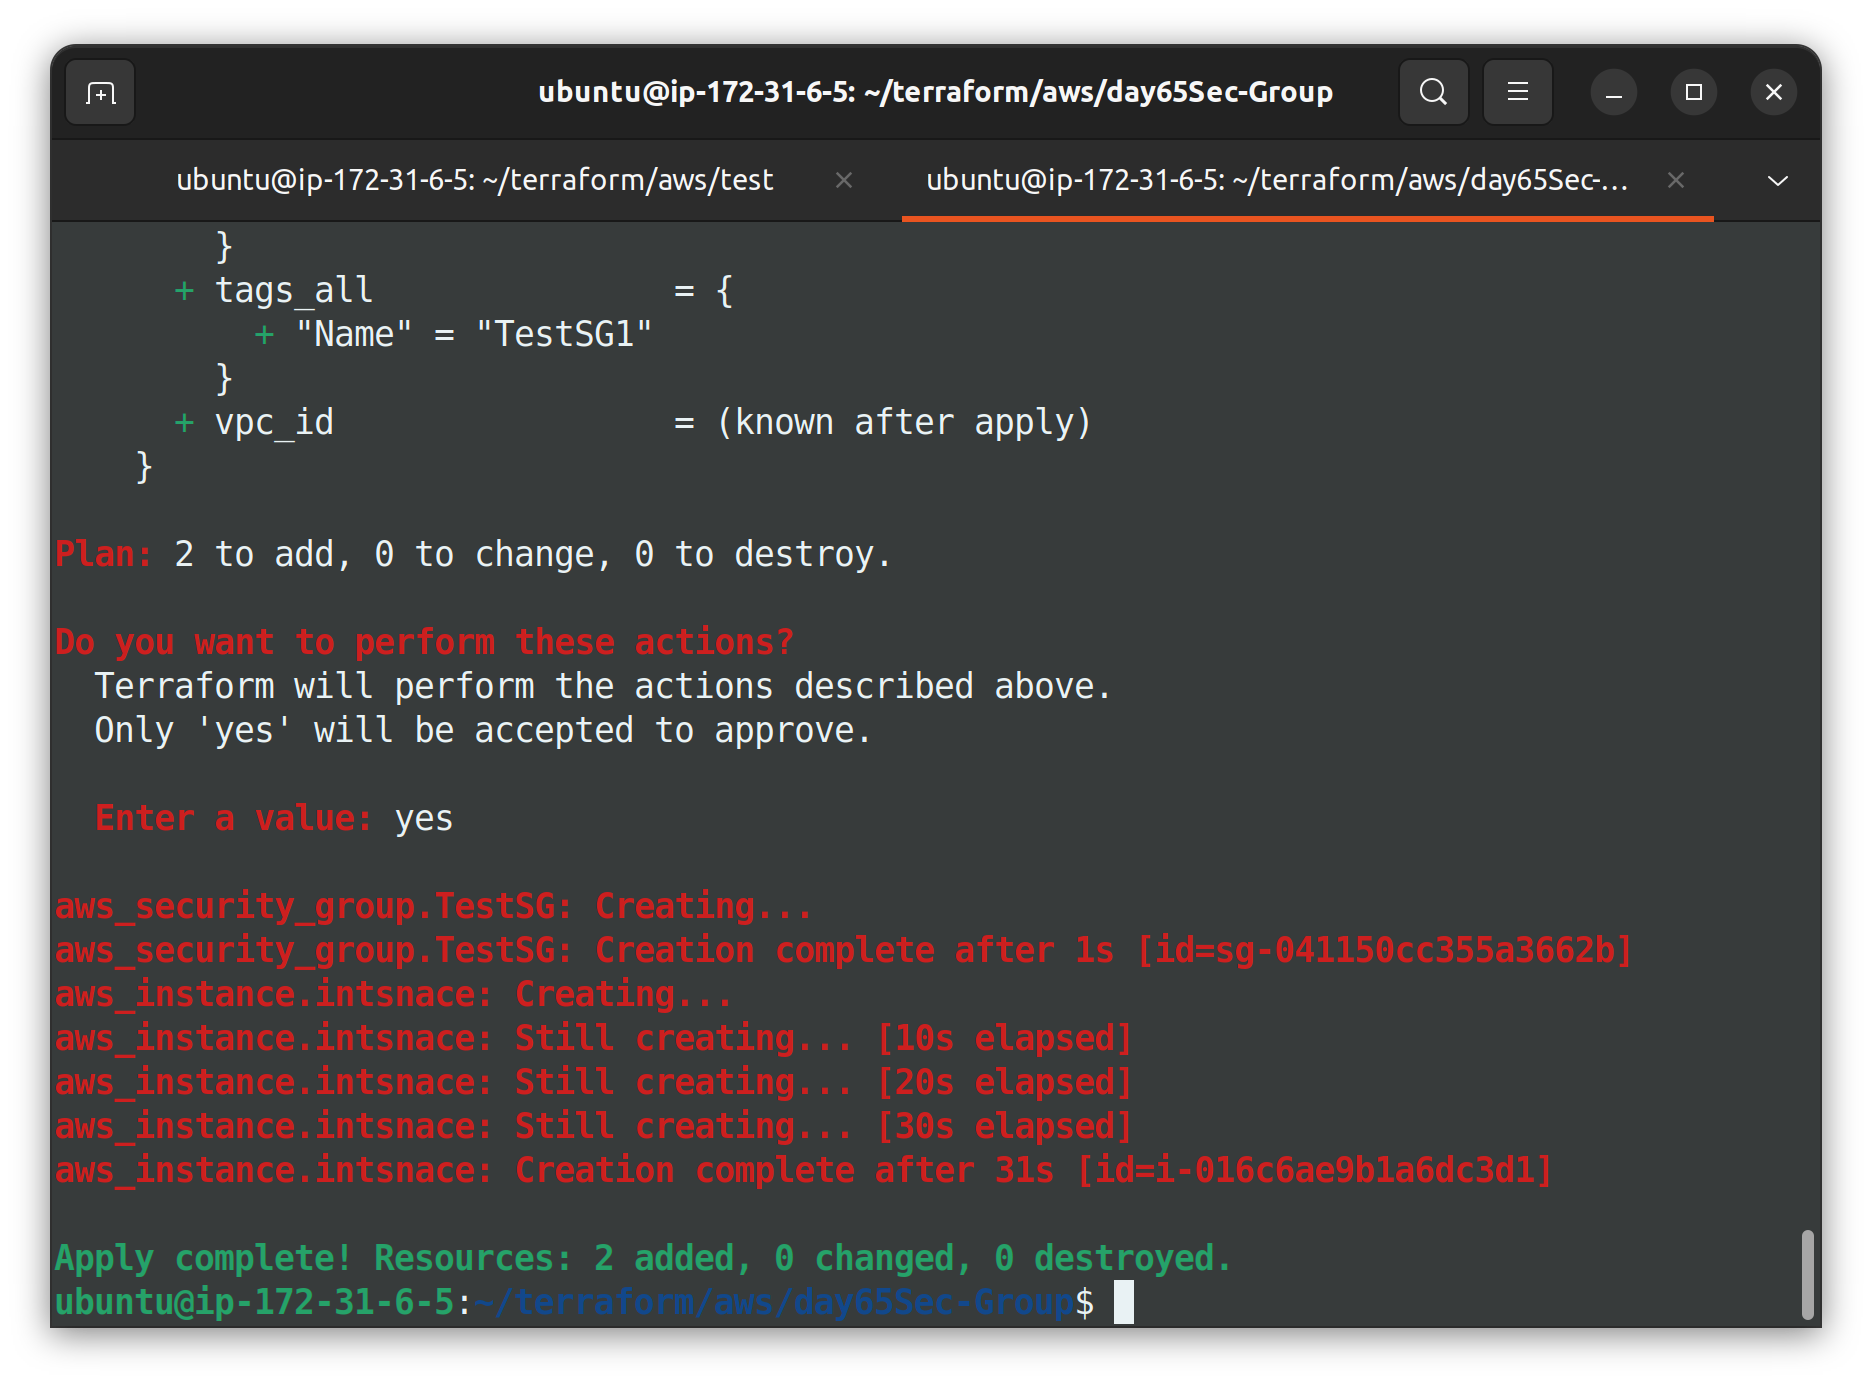
3- Verify the changes
Go to the AWS console, take the public IP of the created instance and search in a new browser tab.
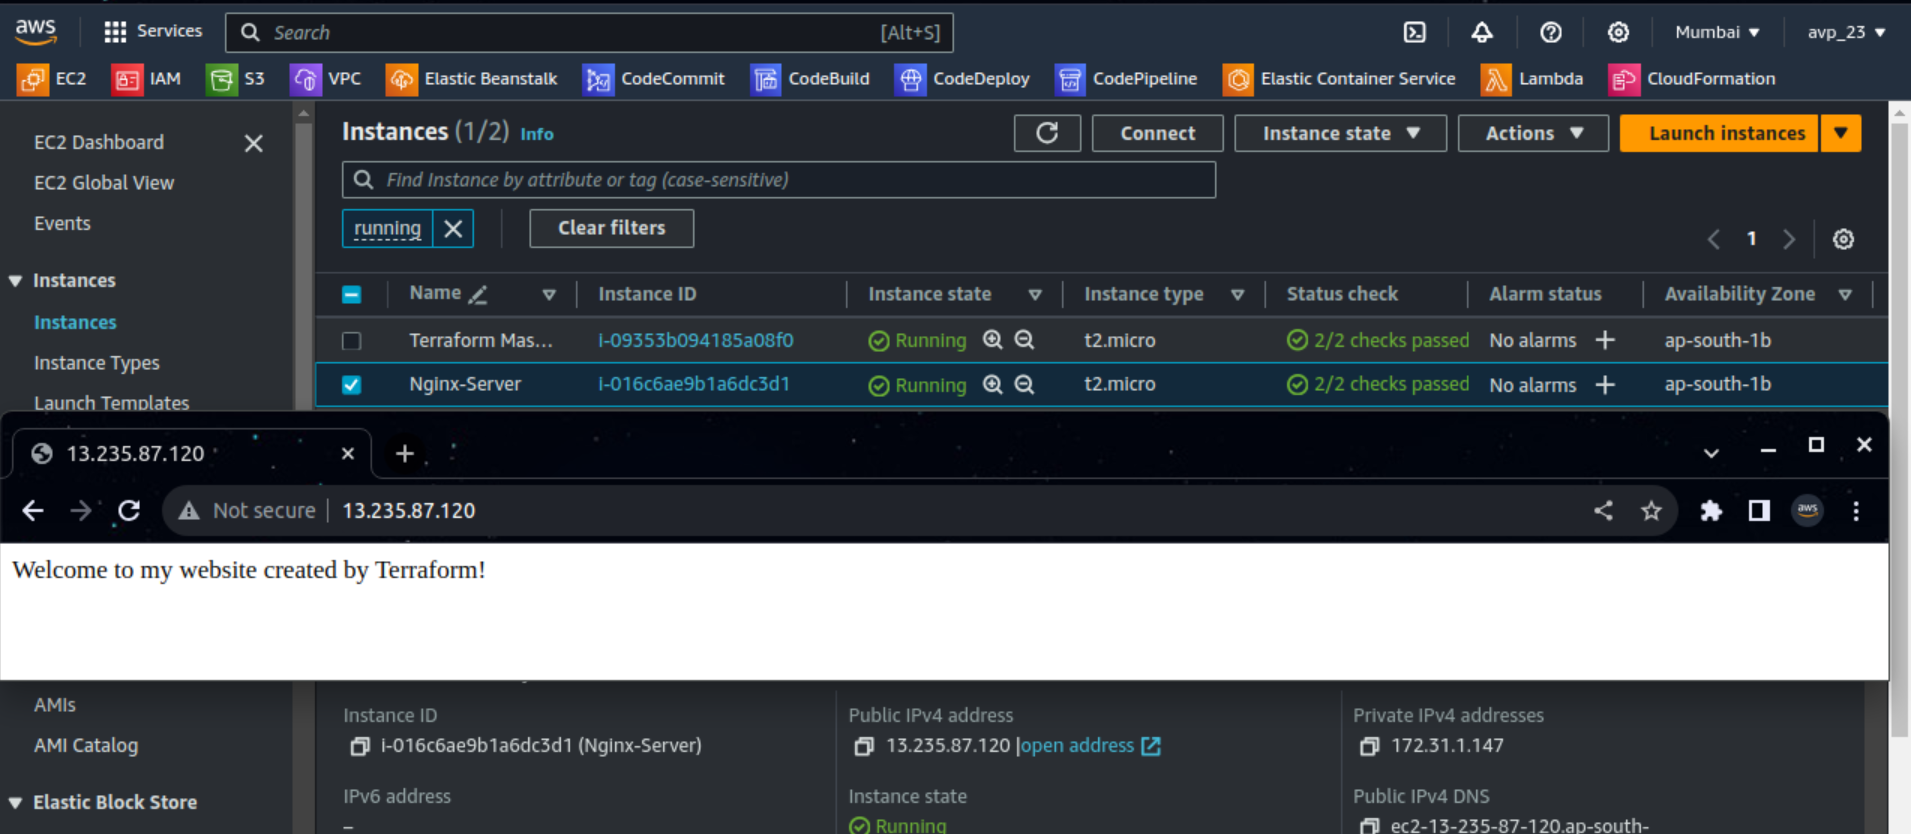
This is how we can deploy our applications or web pages by creating infra on AWS using Terraform.
Thank you so much for taking the time to read till the end! Hope you found this blog informative.
Feel free to explore more of my content, and don't hesitate to reach out if need any assistance from me or in case of you have any questions.
Find me on:- Hashnode LinkedIn Github
Happy Learning!


