
Hey Learners! Welcome back. It's been so far we are learning AWS. Now it's time to test our AWS knowledge by performing the below Tasks as a part of this challenge. Let's complete this challenge...
Task 1-
1- Launch an EC2 instance using the AWS Management Console and connect to it using SSH
Sign in to the AWS console and search for EC2 service.
Select Instances from the left navigation pane and click Launch instances.
Enter the Name for instance and the Number of instances as required.
Select the AMI and instance type as per requirement and use the existing key-pair or generate a new one and store it on the local machine which will help us to connect with a created instance with SSH.
Make sure Auto-assign public IP is Enabled.
In Security groups Allow both HTTP and HTTPS traffic.
Leave the other settings as default and click Launch instance.
Wait till the Instance state is Running. After selecting instance and clicking connect you will have 4 options to connect your instance. Select the SSH client section copy the Example field and Paste it over to the local machine where you store your Key pair.
You will ask for the confirmation and successfully logged into the instance.
2- Install a web server on the EC2 instance and deploy a simple web application
As you already connected with your instance by SSH. First, update your package manager. If you are using Ubuntu use the
sudo apt updatecommand.Now install the web service (apache2) using
sudo apt install apache2command.Start and enable Apache service using
sudo systemctl start apache2andsudo systemctl enable apache2commands.Deploy web applications by copying web application files to the directory of the webserver to serve them. Here copy all the web files in
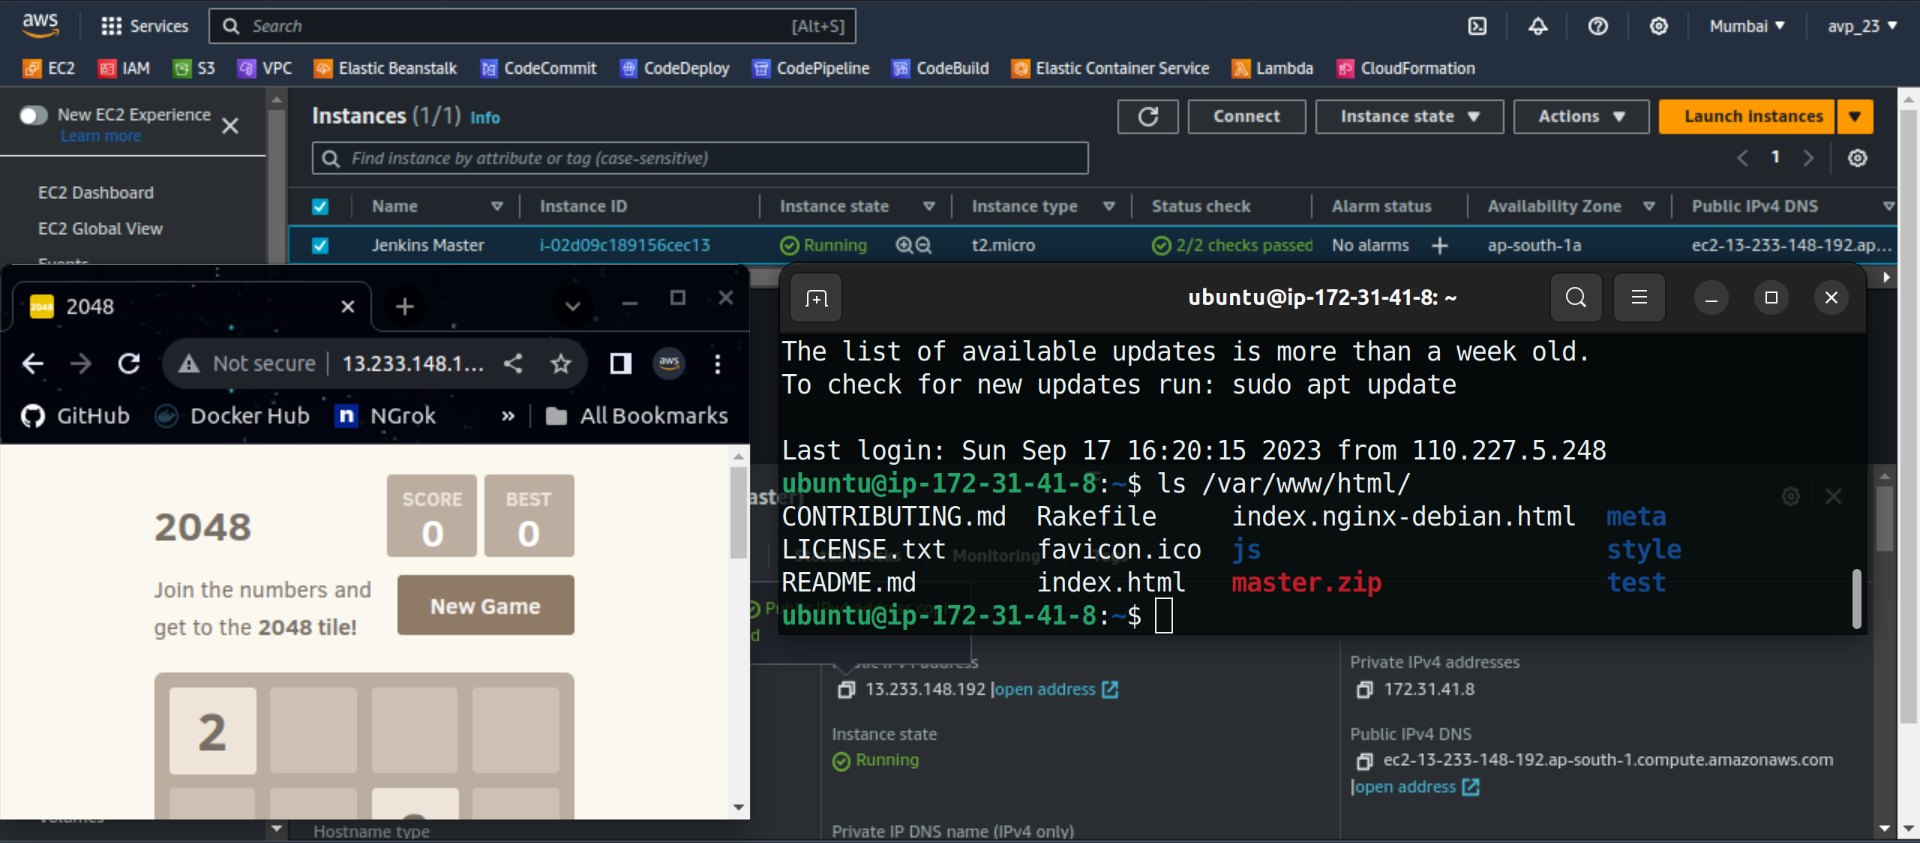
/var/www/html/directory.Verify deployment by entering the public IP of the instance on any browser.
Refer below screenshot for an Example.
3- Monitor the EC2 instance using Amazon CloudWatch and troubleshoot any issues that arise
Search for CloudWatch service and select All alarms
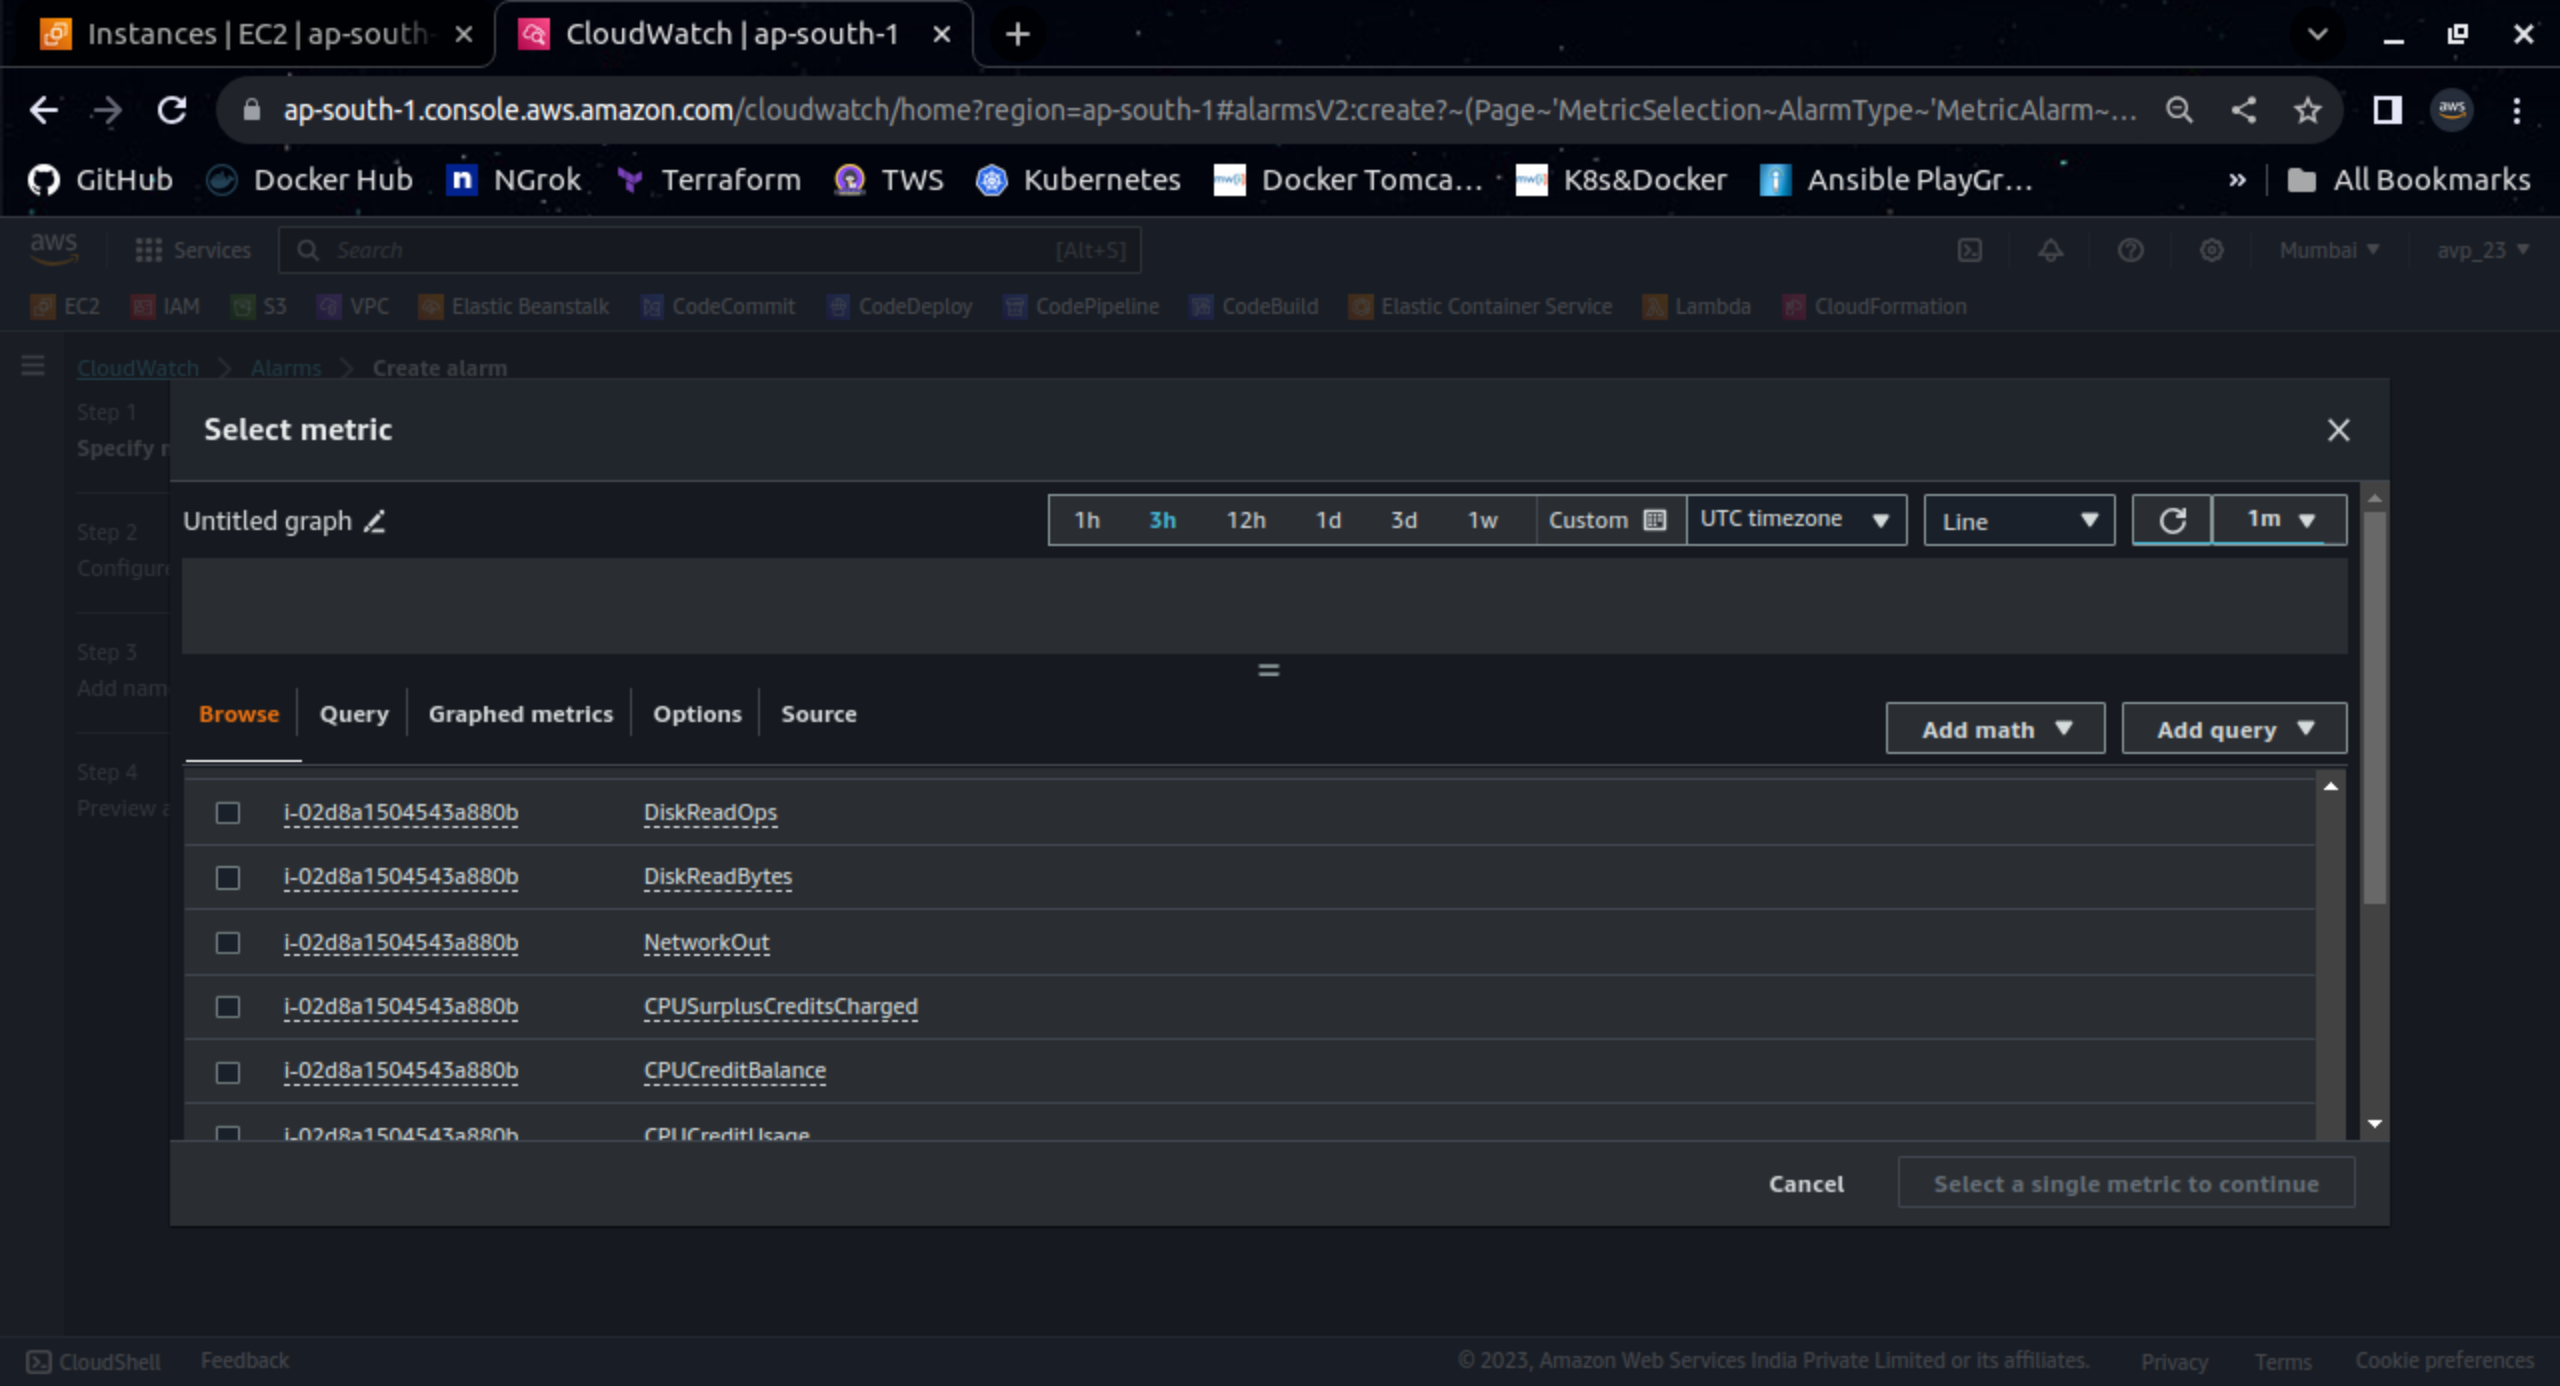
You can create alarms or configure metrics to monitor EC2 activities. Click Create alarm Select metric then choose EC2 Pre-Instance Metrics.
Set up one by one as per requirements like CPU Utilization, Instance Health, Memory, Network In/Out or many more to monitor.
Create a new topic for receiving notifications after you touch the Threshold value.
Use CloudWatch logs and Metrics to troubleshoot any health-related issue with EC2 Instance.
Task 2-
1- Create an Auto Scaling group using the AWS Management Console and configure it to launch EC2 instances in response to changes in demand
Go to the EC2 service dashboard and search for Auto Scaling Groups at last in the left navigation pane.
Select Create Auto Scaling group.
Enter the Name and select Launch template (You need to create a Template for your application. To learn how to create a template click here to see challenge Day40)
Select VPC and Availability zones and subnets
For now, no need to attach any load balancer so choose no load balancer
Specify the Desired, Minimum and Maximum capacity
Review and select Create Auto Scaling group.
2- Use Amazon CloudWatch to monitor the performance of the Auto Scaling group and the EC2 instances and troubleshoot any issues that arise
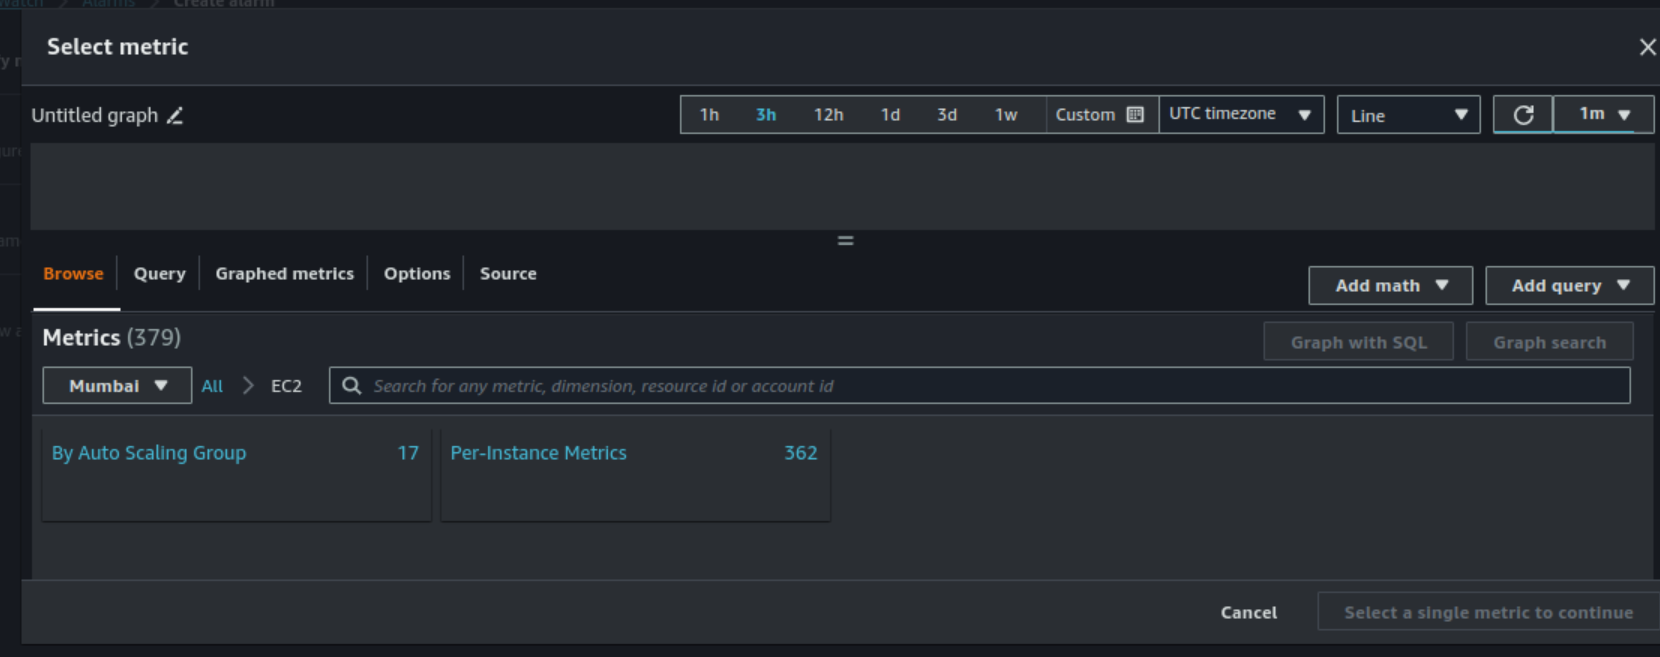
Do the same as we did in Task 1 for EC2 instead of EC2 select By Auto Scaling Group
3- Use the AWS CLI to view the state of the Auto Scaling group and the EC2 instances and verify that the correct number of instances are running
To use AWS service via CLI we have to install and configure AWS CLI
Refer Day42 task to install and configure AWS CLI. Click here
Open the terminal and to view the state of the autoscaling group created use the below command
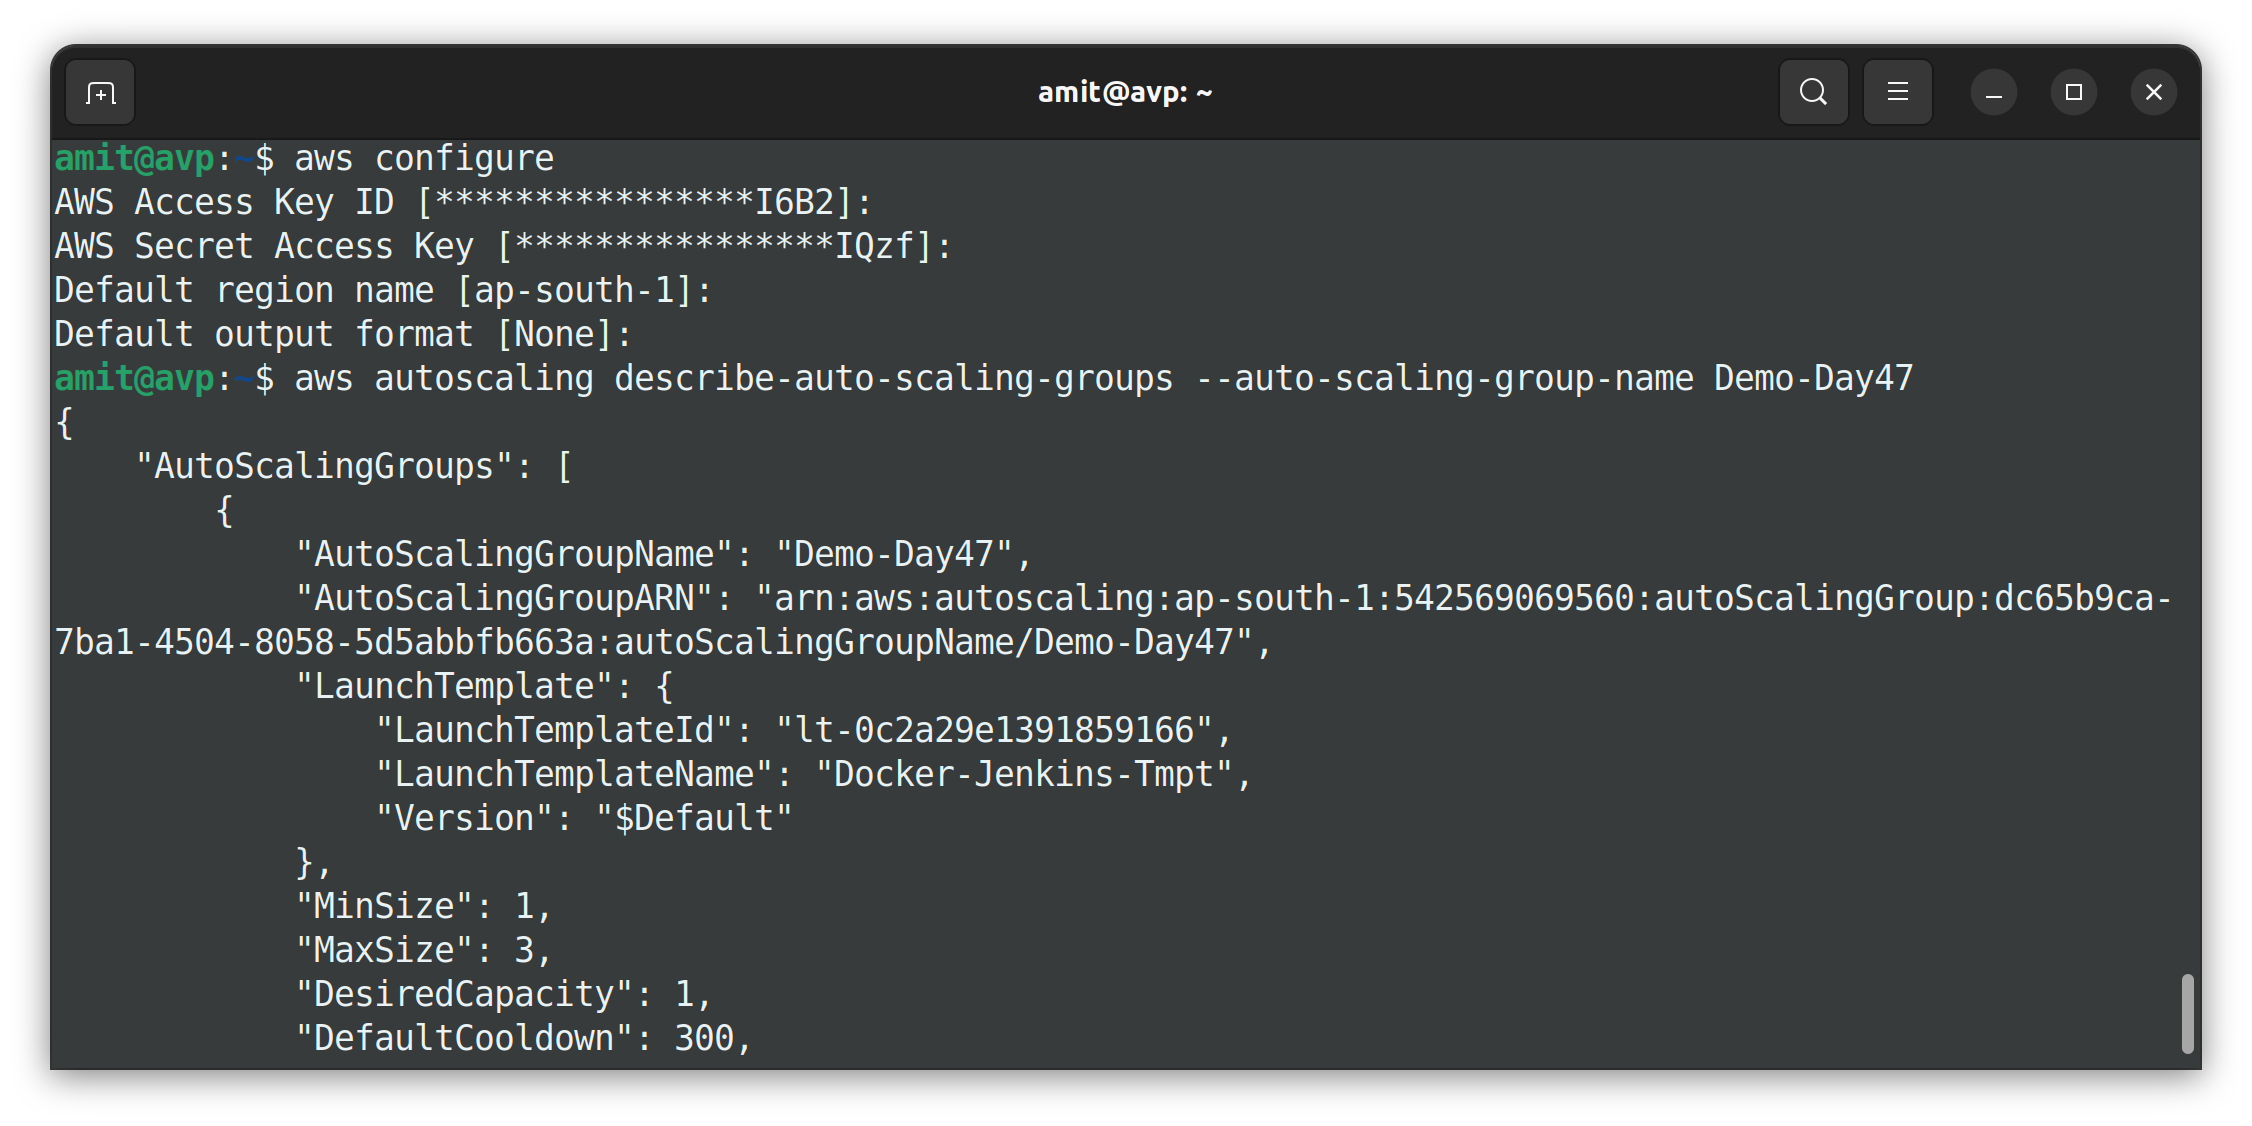
aws autoscaling describe-auto-scaling-groups --auto-scaling-group-name <ASG-NAME>
Thank you so much for taking the time to read till the end! Hope you found this blog informative.
Feel free to explore more of my content, and don't hesitate to reach out if need any assistance from me or in case of you have any questions.
Find me on:- Hashnode LinkedIn Github
Happy Learning!


